3. Quickstart - Installing the WAPT Console
The WAPT Server having been successfully installed, now we will install the WAPT Console.
Managing WAPT is done mainly via the WAPT Console installed on the Administrator’s workstation.
It is recommended that the Administrator’s computer be joined to the Organization’s Active Directory.
The host name of the Administrator’s workstation MUST NOT be longer than 15 characters. This is a limit of sAMAccountName attribute in Active Directory.
The Administrator’s computer will become critical for WAPT administration and WAPT package testing.
Warning
The WAPT Console MUST NOT be installed on the WAPT Server.
The WAPT Console MUST be installed on the workstation from which you manage your network.
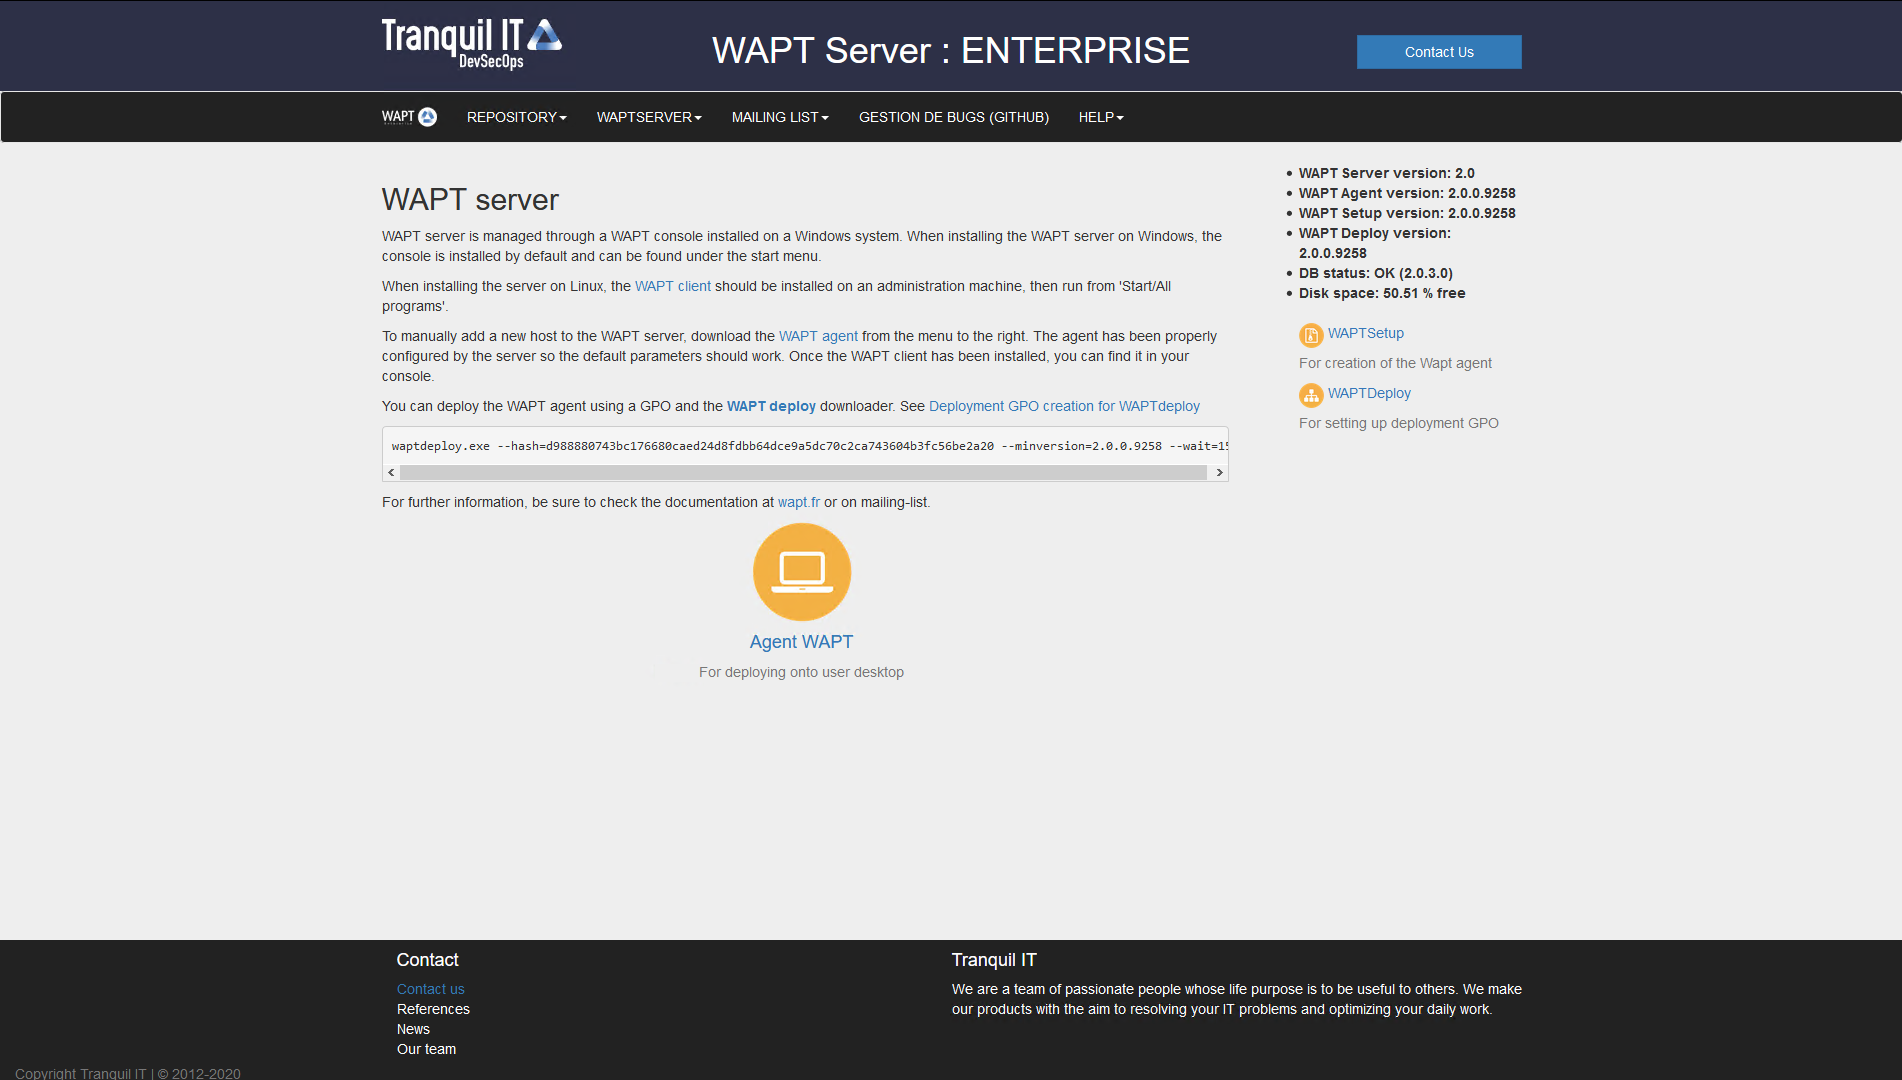
To download the waptsetup.exe file, point your web browser to your waptserver url https://srvwapt.mydomain.lan, then click on the WAPTSetup link on the right-hand side of the WAPT Server web page.
The WAPT Server home page only provides basic server status information and the download link for the WAPT Console.
The WAPT Server interface in a web browser
3.1. Installing the WAPT Setup on the Administrator’s computer
Start the executable installer as Local Administrator on the Administrator’s workstation.
Choose the language for the WAPT installer and click on OK to go on to the next step.
Accept the licence terms and click on Next to go to next step.
Click on Next to keep the default WAPT installation folder.
Click on Next with just Install WAPT service checked.
Set up the WAPT Server URL. The WAPT Server URL can be an IP address, although a FQDN is recommended. Leave the check options as they are.
Check Static WAPT Informations and set:
WAPT repository URL: http://srvwapt.mydomain.lan/wapt.
WAPT Server URL: https://srvwapt.mydomain.lan.
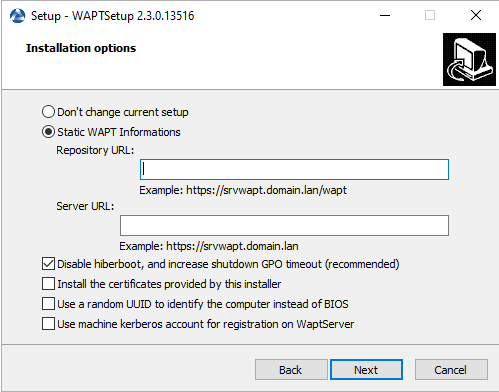
Choosing the WAPT repository and the WAPT Server
Choose the WAPT repository and the WAPT Server; click Next.
Get a summary of the WAPT Console installation and click Install to launch the installation, wait for the installation to complete, then click on Finish (leave default options).
3.1.1. Starting the WAPT Console
Launch the WAPT Console:
By looking for the binary.
C:\Program Files (x86)\wapt\waptconsole.exeOr using the Start Menu.
Log into the WAPT Console with the SuperAdmin login and password.
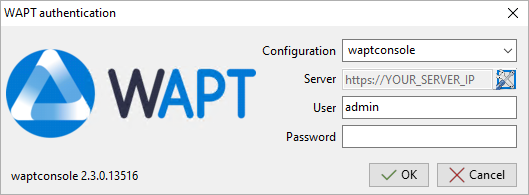
The WAPT Console authentication window
On first start, you MUST start the WAPT Console with elevated privileges. .
Note
The recommended screen resolution for using the WAPT Console is 1920x1080 and the minimum screen resolution is 1280x1024.
3.2. Generating the Administrator’s certificate for signing WAPT packages
A message will appear indicating that no personal certificate has been defined.
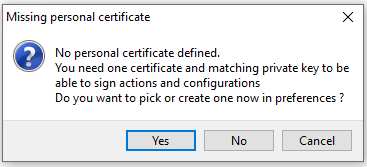
WAPT personal certificate not found in the WAPT Console
Select Yes
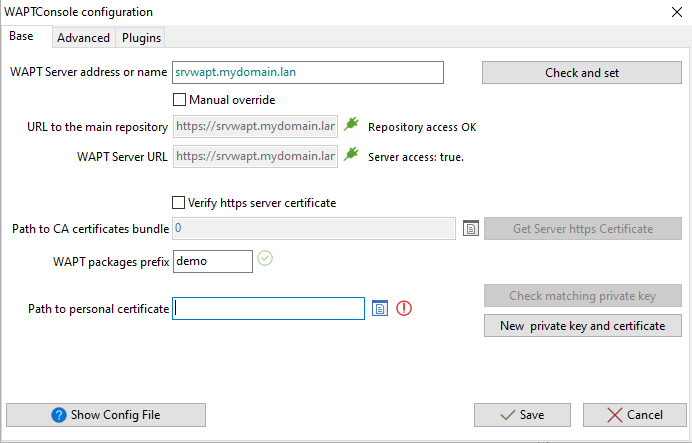
Window for the basic configuration of the WAPT Console
Click on New private key and certicate to create your certificate.
In the example, the name of the public certificate signed with the private key is
wapt-private.crt. This certificate is used to validate the signature of packages before installation. If the public certificate used on the WAPT Console is not derived from the private key used for generating the WAPT Agents, the WAPT Console will not see the WAPT Agents and you will not be able to perform any action on any WAPT Agent.In the example, the name of the private key is
wapt-private.pem. It is located by default in theC:\privatefolder of the Administrator workstation and is password protected. It will be used along with the certificate to sign packages before uploading them onto the WAPT repository.Danger
The
wapt-private.pemfile is fundamental for security. It MUST be stored in a safe place and correctly protected. Thewapt-private.pemfile MUST NOT be stored on the WAPT Server.Fill the informations to create a self-signed certificate.
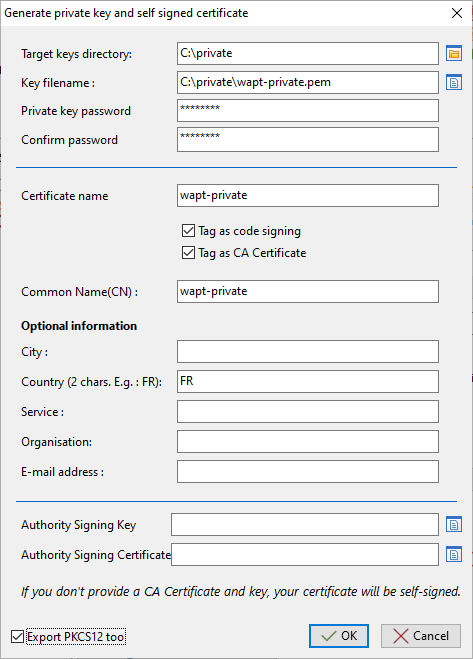
Click on OK to go on to the next step.
Click on Yes to copy the newly generated certificate in the folder
C:\Program Files (x86)\wapt\sslon Windows or/opt/wapt/sslon Linux or macOS. This certificate will be picked up during the compilation of the WAPT Agent and deployed on the client computers.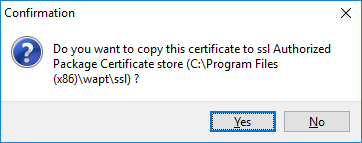
Dialog box requesting confirmation of the copy of the certificate in the ssl folder in the WAPT Console
3.3. Packet prefix definition
A message will appear indicating that no package prefix has been defined.
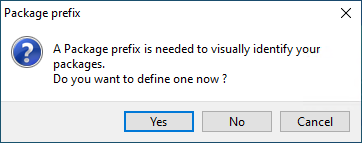
Dialog box informing that no prefix has been set in the WAPT configuration
Select Yes.
Set your packages prefix on WAPT packages prefix.
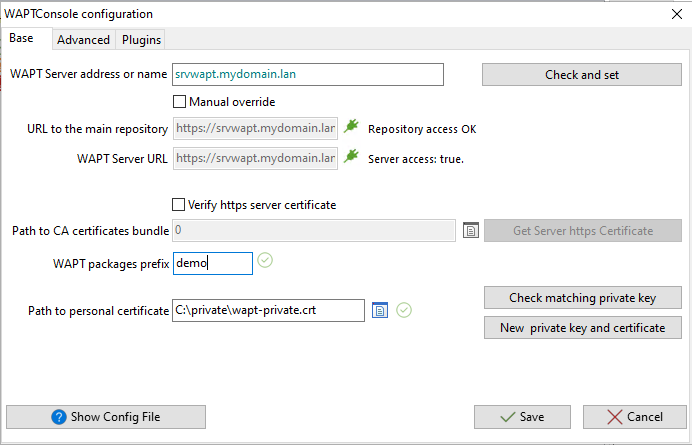
Window for the basic configuration of the WAPT Console
3.4. Activating a WAPT licence
A message will appear indicating that no licence has been found, click on yes to activate a licence. To activate the licence, use the
licence.licfile provided by our sales department.

Window listing no subscribed WAPT licences in the WAPT Console
3.5. Creating the WAPT Agent
Note
A message may appear indicating that your WAPT Agent version is obsolete or not yet present.
If the Administrator’s certicate already exists, you can now generate the new WAPT Agent by clicking on Yes.
If no Administrator’s certificate exists, click on No to generate the Administrator’s certicate.
Generating the WAPT Agent from the WAPT Console
Fill in the informations that are necessary for the installer.
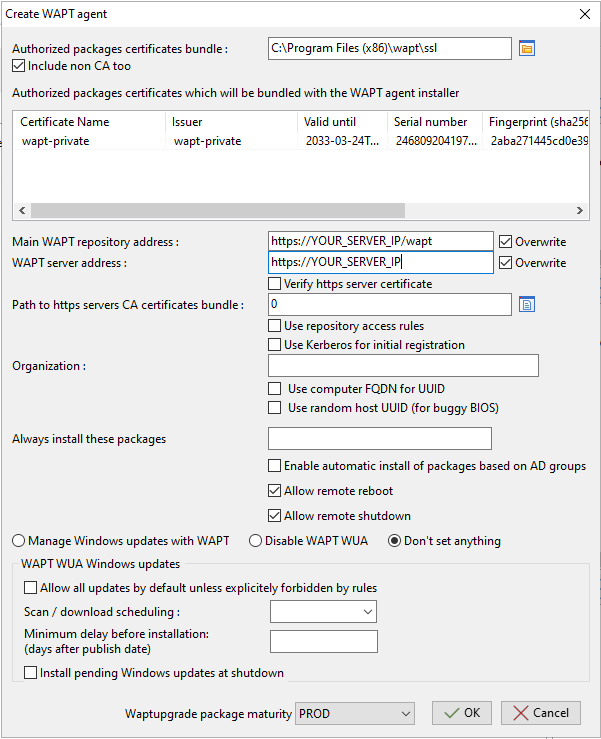
Filling in the informations on your Organization
Provide the password for unlocking the private key.
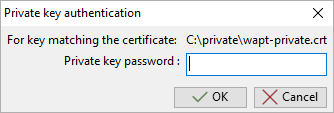
Providing the password for unlocking the private key
Once the WAPT Agent installer has finished building, a confirmation dialog pops up indicating that the waptagent binary has been successfully uploaded to https://srvwapt.mydomain.lan/wapt/.