9. Using audit data into plugins for WAPT package compliance and for external services  
9.1. Displaying host audit data in the WAPT Console 
You can manage audit output and display the audit result if you activate the option in the Tab. Check the Show host audit data tab to see the tab Audit Data on each client.
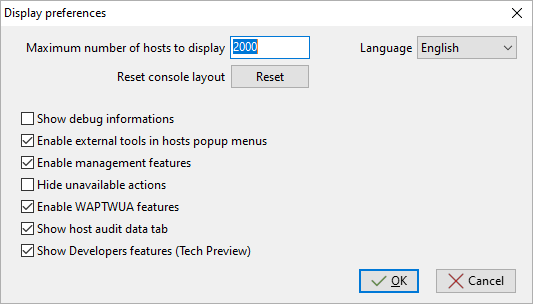
Window showing the advanced preferences
To use audits in WAPT packages, visit this page to manage audit_data.
9.1.1. Displaying encrypted data with a certificate in the audit data tab
With audit function, it is possible to encrypt sensitive data coming from remote hosts; it will be possible to read the encrypted sensitive with a certificate installed on the WAPT Administrator’s host. This way, the WAPT Server may store sensitive inventory data without the WAPT Server becoming a sensitive asset.
This method is particularly useful for example for securely managing LAPS random passwords in WAPT.
In setup.py, you can use a function to encrypt data with a certificate.
If you have the private key matching the certificate that was used to encrypt the data, the data will be decrypted and it will appear in a readable form.
Here is an example of code:
# -*- coding: utf-8 -*-
from setuphelpers import *
from waptcrypto import print_encrypted_data

def audit():
  randompassword = '1234'
  print_encrypted_data(randompassword, glob.glob('*.crt'))
This code will encrypt the password 1234 with all certificates present on the host that is used to manage WAPT. From the WAPT Console, you will see in the audit_data tab the crypted version and you can decipher the data with your private key associated to the public certificate that was used to encrypt the data.

9.2. Synchronizing WAPT inventories to GLPI 
9.2.1. Working principle
WAPT Enterprise offers synchronization between the inventories of your hosts and GLPI ITSM Software.
The method automatically synchronizes changes on your IT infrastructure with the GLPI server.
WAPT can synchronize with GLPI 10 using the native JSON API. WAPT can synchronize with GLPI version 9.x using the FusionInventory plugin with XML format.
Attention
GPLI on WAPT does not work with Kerberos authentification for GLPI.
If you use Kerberos for GLPI, exclude glpi/plugins/fusioninventory/ from the Nginx authentification.
9.2.2. Installing the required dependencies for GLPI 9.x
In order to receive inventories on the GLPI server, the FusionInventory plugin will need to be installed on the GLPI server. This is not required for GLPI 10 which has its own native JSON API.
Note
After installing FusionInventory on the GLPI server, an endpoint needs to be configured on the WAPT Server to send the inventories to the GLPI server:
http:/glpi.mydomain.lan/glpi/plugins/fusioninventory/
9.2.3. Configuring WAPTAgent and sync package
Install and configure the WAPT Agent on the computer that will run the synchronization. The WAPTAgent is installed by default on the WAPTServer, it just need to be configured.
To configure the WAPTAgent, please refer to the corresponding documentation.
Then you need to install the GLPI sync package:
for GLPI 9.x, you need to install the package tis-glpi-plugin-export-to-glpi9
for GLPI 10.x, you need to install the package tis-glpi-plugin-export-to-glpi10
You need to configure an audit schedule on the agent
[global]
...
waptaudit_task_period=120m
...
With the chosen package, it will create two ini file in your $WAPT_INSTALL_DIR/private (linux : /opt/wapt/private, windows : C:Program Files (x86)waptprivate`).
Connect to the host and modify glpi.ini and wapt_api.ini files.
For GLPI9:
[glpi]
username = glpi
password = xxxxxxx
url = https://glpi.xx.xxxxx.xx/plugins/fusioninventory/
For GLPI10:
[glpi]
username = glpi
password = xxxxxxx
url = https://glpi.xx.xxxxx.xx/front/inventory.php
For GLPI10, please also ensure inventory is enabled.
For both GLPI9 and GLPI10:
[wapt]
username = waptregister
password = waptregister2023!
url = https://srvwapt.ad.tranquil.it
To test the current configuration, you can trigger an audit
wapt-get audit tis-glpi-plugin-export-to-glpi9
# or
wapt-get audit tis-glpi-plugin-export-to-glpi10
9.2.4. Current items sent by WAPT to the GLPI server
Value |
Sent |
Not sent |
|---|---|---|
Computer name |
|
|
User name |
|
|
Description |
|
|
OS name |
|
|
OS version |
|
|
Language |
|
|
CPU |
|
|
Memory |
|
|
Battery |
|
|
Chassis type |
|
|
Physical or virtual |
|
|
Network card configuration |
|
|
Printer list and properties |
|
|
Installed software [1] |
|
|
Network drives |
|
|
Environment variables [2] |
|
|
Display screens references |
|
|
Mouse and keyboard references |
|
|
Controllers card references (except graphic card) |
|
|
Antivirus version |
|
|
Firewall state |
|
|
Local group list |
|
|
Memory bank list and state |
|
|
USB ports list and connected devices |
|
|
Printer status |
|
|
Card readers |
|
|
System wide Appx list |
|
Footnotes
9.2.5. Possible errors in reported inventory on the GLPI server
Inventories uploaded by the WAPT Server to the GLPI server may be incomplete or may have errors when compared to inventories uploaded directly by the FusionInventory agent deployed on hosts. One reason is that WAPT aims to report only the most important values.
If you feel that important items are missing or are reported in a wrong way, please report the issue to the Tranquil IT dev team.
To report the issue, you will need to send 2 .xml files.
First, install the FusionInventory agent on the computer on which you are observing a missing or wrongly reported inventory item.
Run the FusionInventory agent and extract the report into a
.xmlfile.
"C:\Program Files\FusionInventory-Agent\fusioninventory-inventory" > %TEMP%\inventory.xml
fusioninventory-inventory > /tmp/inventory.xml
fusioninventory-inventory > /tmp/inventory.xml
Set the debug directory in the waptserver.ini.
glpi_inventory_debug_directory = /tmp/glpi
Restart the WAPT Server
Retrieve the
/tmp/glpi/UUID.xmlfile from the WAPT Server, the UUID being the identifier of the host.Send the 2 files to the Tranquil IT dev team.
9.3. Synchronizing WAPT inventories to Cyberwatch for security breaches 
9.3.1. Working principle
WAPT Enterprise offers synchronization between the inventories of your hosts and Cyberwatch ISVM Software.
The method automatically synchronizes information about updates or installed softwares to Cyberwatch tool in order to scan and alert you about detected vulnerabilities.
9.3.2. Configuring Cyberwatch server side
Connect to your Cyberwatch server and go to your profile.
In the API section, click on See my API Keys.
Click on Add and name your API access key for WAPT.
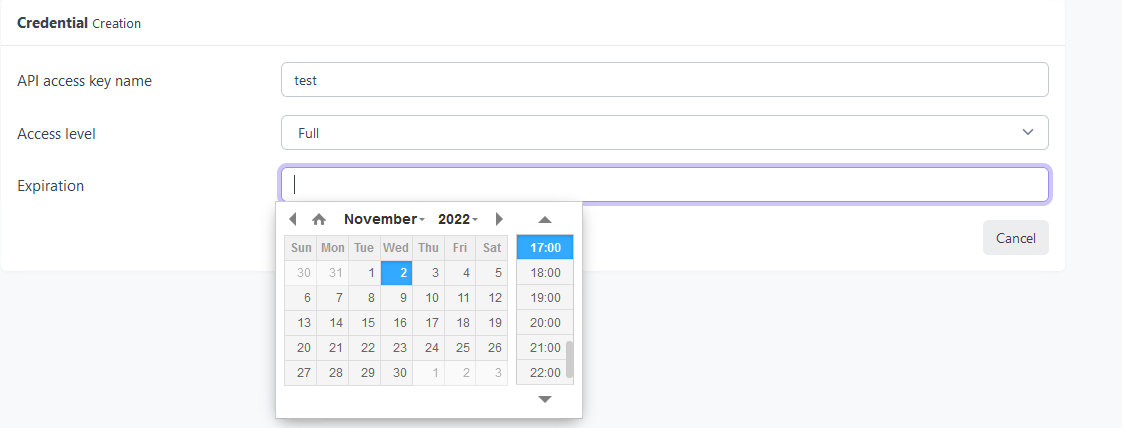
Set the access level to Full and give an expiration date. If you don’t give one, the key will never expire.
This key with its API access key ID will allow you to use the Cyberwatch API for our WAPT package.
9.3.3. Configuring WAPTAgent and sync packages
Install and configure the WAPT Agent on the computer that will run the synchronization. The WAPTAgent is installed by default on the WAPTServer, it just need to be configured.
To configure the WAPTAgent, please refer to the corresponding documentation.
Yu can have two packages :
if you have the Cyberwatch agent, you can import from Cyberwatch installing the package tis-cyberwatch-plugin-import-from-cyberwatch, it will give you information directly on your WAPT Console.
for agentless devices, you still can export to your Cyberwatch server information of you WAPT hosts installing the package tis-cyberwatch-plugin-export-to-cyberwatch-airgap, it will give you information to your Cyberwatch Console without Cyberwatch agent installed.
You need to configure an audit schedule on the agent
[global]
...
waptaudit_task_period=120m
...
With the package, whichever you chose (you can oblviously choose both), it will create two ini files in your $WAPT_INSTALL_DIR/private (linux : /opt/wapt/private, windows : C:Program Files (x86)waptprivate`).
Connect to the host and modify cyberwatch_api.ini and wapt_api.ini files.
[cyberwatch]
api_key =
secret_key =
url = https://cyberwatch.mydomain.lan
[wapt]
username = waptregister
password = waptregister2023!
url = https://srvwapt.ad.tranquil.it
To test the current configuration, you can trigger an audit
wapt-get audit tis-cyberwatch-plugin-import-from-cyberwatch
# and/or
wapt-get audit tis-cyberwatch-plugin-export-to-cyberwatch-airgap